Homebrew 10 foot Wind Turbine, COIL WINDER
Coil Winder Instructions.
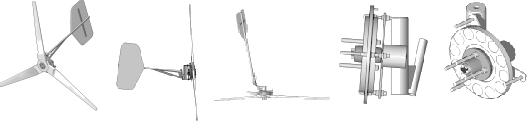
Before we can build our wind turbine there are a few tools we need to make. We'll need to make moulds for the magnet rotors and the stator, and we need to make a coil winder. It's simply a spool made from wood, with a crank that we can wind our coils on. The next couple of pages will detail exactly how we made ours, but the idea here is simple and there are surely many simpler ways to do this. Some of the thoughts that went into this design included: having a fairly large crank which makes handling thicker wire easier, and having the back disk oversized, with steel pins so that we can change the form of the coil and build different/larger sizes of coils if necessary. Ours is also constructed like this because these were all materials we had on hand. Your situation may be different. For a one off project, this could all be simplified some. Before building this it might be helpful to read the section on building the stator so you understand how we use this tool - that will help you to understand why we make it this way, and give you ideas about other possible ways to make a good coil winder. Listed below are all the parts we'll require for this project.
Parts List
- ¼" Plywood disk 6" diameter
-¼" Plywood disk 4" diameter
-3/8" plywood rectangle, ¾" x 1.5"
-5/8" plywood disk 6" diameter
-1" wooden dowel 2.5" long
-1.5" steel square tubing 7" long
-1" x ¼" steel barstock 5" long, qty 2
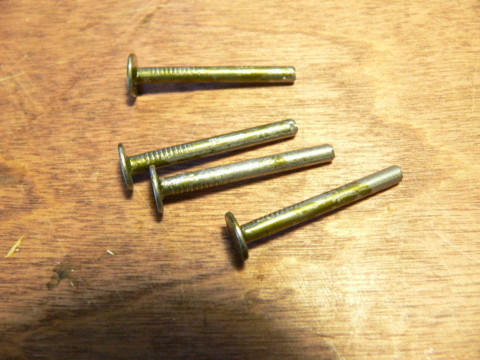
-5/16 - 18 bolt, 3.5" long
-5/16 - 18 bolt, 2.5" long
-¼" SAE washer, qty 2
-5/16 - 18 wing nut
-16 Penny nail, qty 5
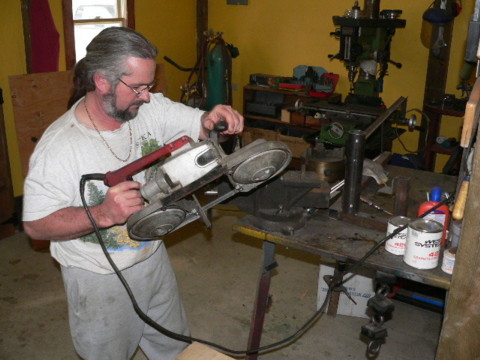
First step is to cut out some metal parts. I find the portable metal cutting band saw fast and easy, but a hack saw, sawzall or even a torch would work fine. In building wind turbines we often have to adapt a design to accommodate the tools are resources that are available to us, sometimes this requires some imagination.
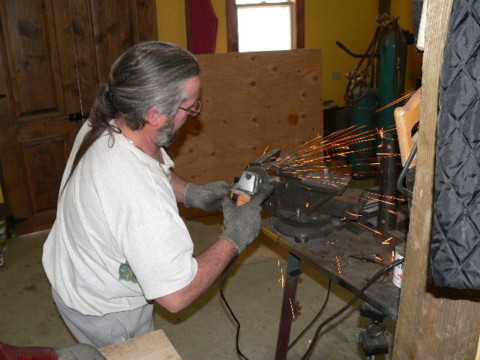
Whenever we cut metal there are sharp burrs at the cut. It's nice to clean up all our cuts (and welds) with a grinder. Pictured above George is grinding the cuts (he should be wearing a face mask).
Here is the square tubing we cut that supports the coil winder. We need to cut it off square at 7" length, and drill a 5/16" hole through it.
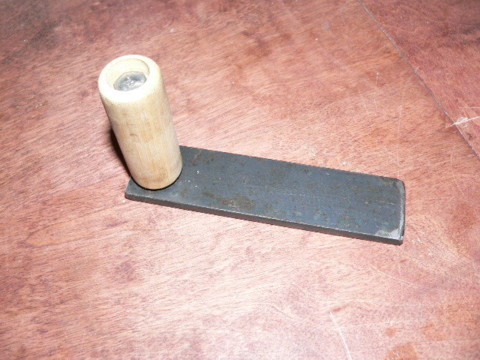
Cut two of these 5" long from 1" x ¼" tubing. One will be welded to the bottom of the tubing. The other requires a hole to be drilled and tapped 5/16" - 18. This one will serve as the crank, and the handle will screw into the tapped hole.
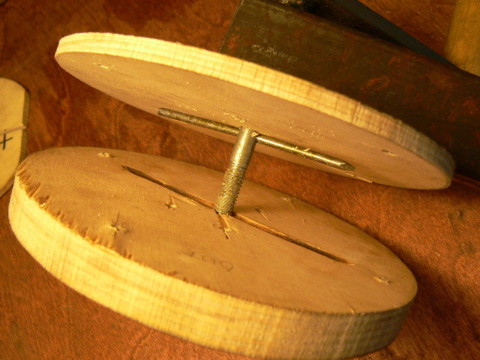
Make this part from a 1" diameter wooden dowel. Overall it's 2.5" long, and we drill through 21/64" so that it turns freely on the 5/16" bolt. We also need to drill in 5/8" with a 5/8" drill bit to accommodate the head of the bolt.

We cut the dowel off with any saw, and then drill it out on the lathe. While it's on the lathe it's nice to round the edges and sand it a bit. If you don't have a lathe, you could do this carefully with a hand drill or drill press, or - if it's just for one machine the wooden handle is not very important, it just makes for more comfortable winding.
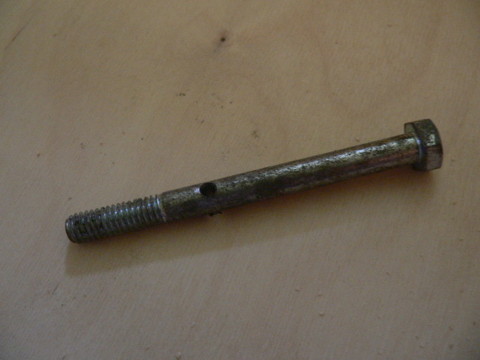
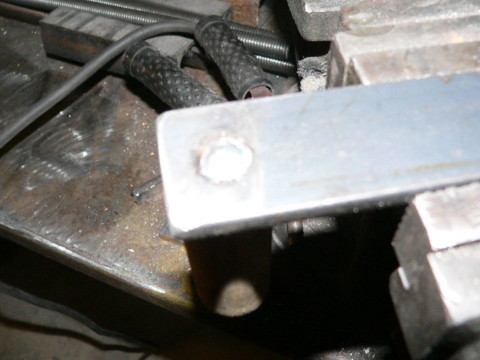
Drill a hole (9/64") through the 3.5" long bolt. The hole should be drilled on center at 2 3/8" from the bottom of the bolts head. The 9/64" hole is a good diameter to fit a 16D nail pretty tightly.
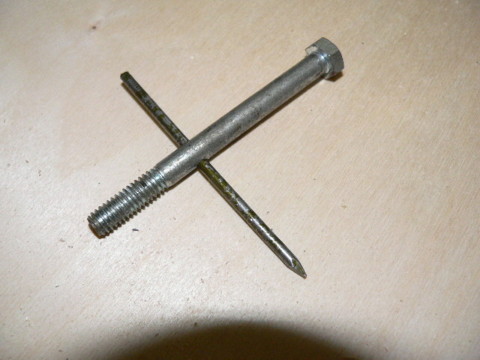
The nail serves as a pin to lock the spool to the shaft (the bolt is the shaft)
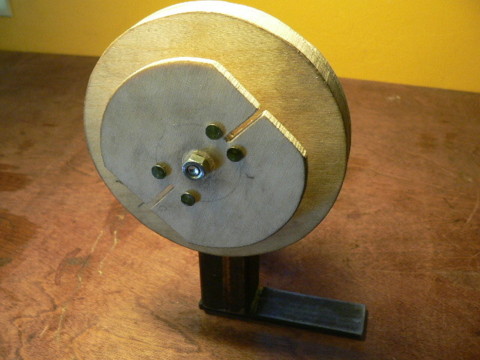
Make 3 wooden disks. One is of 5/8" plywood (I prefer Baltic birch for this) and is 6" diameter. Another is also 6" diameter, from ¼" plywood. We also need a smaller 4" diameter disk (in some of the pictures we show a larger diameter disk on the front of this coil winder that's been cut on two sides down to only 4" tall with two slots. To avoid confusion just make that disk 4" in diameter and keep the slot on one side as described later in the plans). All of these need a 5/16" hole in the center. The 6" dia 5/8" thick disk needs a slot cut to accommodate the nail we use for a pin. The slot should be about 1.4" wide and deep, and 3.5" long so that a 16 penny nail with its head cut off fits in there. Both the 6" dia 5/8" thick disk, and the smaller 4" disk need 4 9/64" holes drilled as shown in the picture above. These holes will accommodate pins around which we'll wind the coils. Take the 6" diameter ¼" thick disk, and drill 4 holes, 3/32" evenly spaced on a 5" diameter, and run a countersink in them. We'll be using wood screws to attach this disk to the thicker one, and we want the heads flush with the plywood. It's important that holes line up nicely here. I would suggest screwing the smaller disk, and the thicker 5/8" disk together and drilling all the holes together.
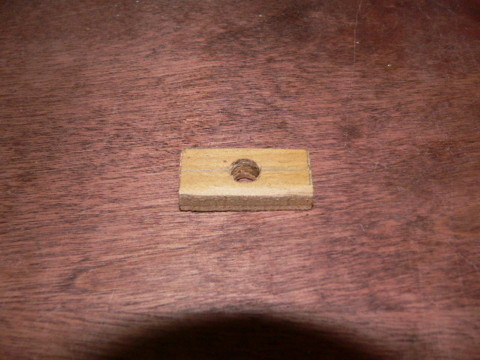
Cut a piece of 3/8" plywood rectangular as shown above. It's 1.5" tall, and ¾" wide. Drill a 5/16" hole through the center. This serves as a spacer between the disks.

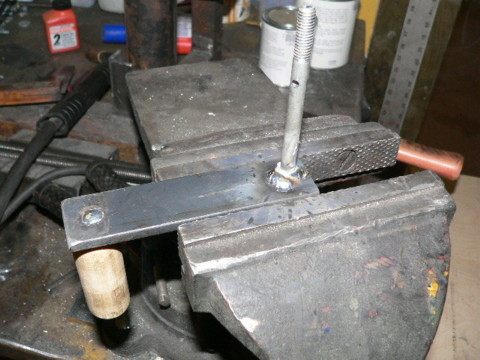
Weld the 5" long bar stock that has no holes in it to the bottom (the end furthest from the hole) of the square tubing. This serves as a base so that we can clamp the coil winder to a workbench.
Put the shorter bolt (2.5" long) through the wooden handle and thread it into the 5" long bar stock which has been drilled and tapped to accept the bolt. Put a washer in between the handle and the bar stock. Thread the bolt in so that the threads come flush with the back of the bar stock, and the handle should turn freely.
Turn it over and spot weld where the bolt is through the bar stock -this assures that the handle will never come loose.
Take the longer bolt (the one with the hole drilled in it) and weld it to the other end of the handle as shown in the picture. It needs to be square!
Put a washer over the bolt that's sticking out (we always want a washer between any part that turns, and any part that doesn't) and insert the bolt through the hole in the square tubing.
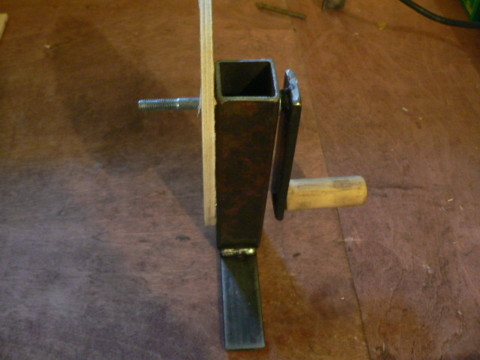
Put another washer on and then put the 6" diameter ¼" thick disk on. The countersunk holes need to be pointing back, towards the handle.

Insert the pin through the shaft and center it.
Put the 5/8" thick disk on the shaft so that it fits over the pin that's through the shaft, and bring it tightly against the ¼" thick disk.
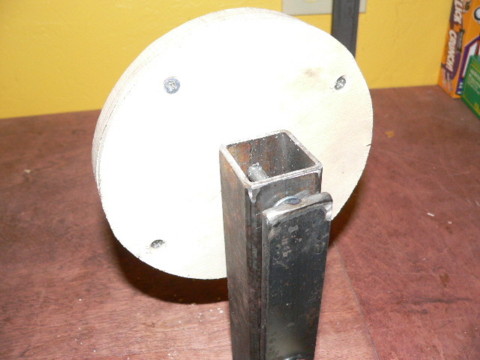
Use 5/8" long wood screws to screw the two disks together coming in through the back of the coil winder, through the 4 holes we drilled and countersunk earlier. The screw heads need to be flush, they must not stick out.

Put the small rectangular spacer on and align it so that its in between all the 4 holes which will hold the pins around which the coil is formed. Tack it there with a touch of glue so it doesn't rotate.

Cut a slot in the front 4" diameter disk as shown. It should be about 1/8" wide and should come right to the center, and stop between the two pins that are nearest each other. We'll start winding the coils from this slot and it needs to be centered at the narrowest part of the coil.
Cut 4 16 penny nails and cut them 1.125" long (including the head). De-burr the ends you've cut (so they're not sharp). Once the coil winder is finished, we'll insert these through the 4 holes in the front (4" diameter) disk and they'll also go into the holes in the rear disk, so that the disks are pinned together and the pins will be supported both in the front and in the back. These 4 pins will form the center of the coil.
Put the front on and use the wing nut to hold it on there. (Ours which is featured in the pictures uses a normal nut - a wing nut is easier though) The coil winder is finished, we'll discuss how to use it when we start making the stator.
Click Here to return to the front page of this project.