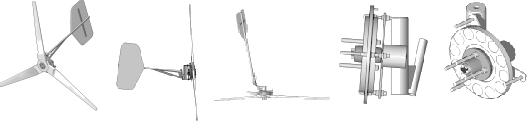
Homebrew 10 foot Wind Turbine, BLADE ASSEMBLY
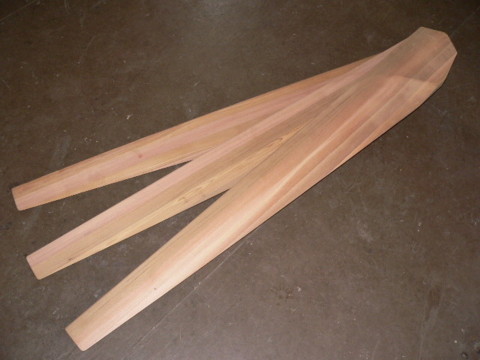
At this point you've carved 3 nearly identical wind turbine blades. This next section will detail how we assemble them. Following is the list of materials and hardware required to assemble the blades. Some of this is optional, certain things could be done differently. Some folks prefer to glue the blades/hubs togther - this design is such that you can disassemble the blade set should you ever need to replace parts.
- 1.25" galvanized wood screws, qty 60
- 5/16 - 18tpi 3" long carriage bolts, qty 6
- 5/16" washers, qty 6
- 5/16" lock washers, qty 6
- 5/6" - 13tpi nuts, qty 6
- 11" diameter disk cut from 1/2" plywood (preferably Baltic Birch), qty 2
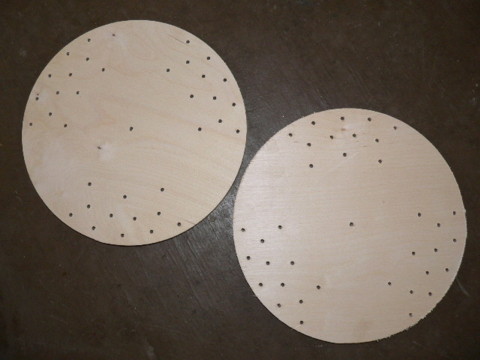
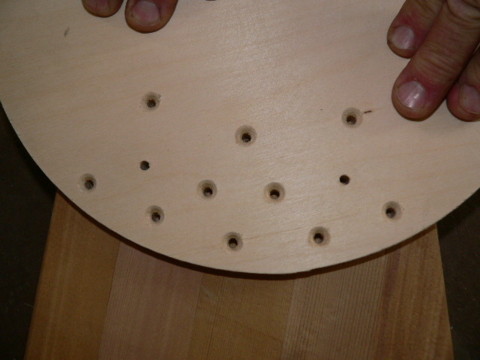
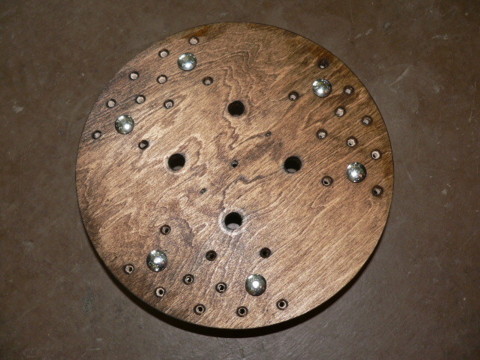
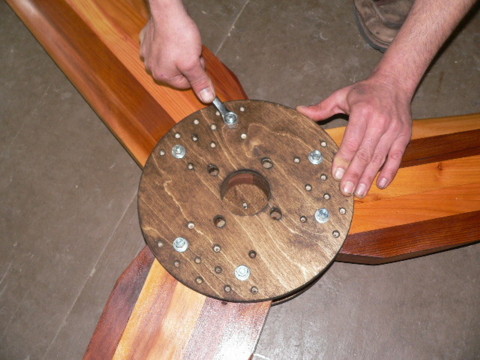
The blades for the 10' diameter wind turbine will be sandwiched between two plywood hubs, 11" in diameter. Baltic Birch plywood is much stronger than normal plywood and holds up to weather well - we prefer to use it for the blade hubs. Normal plywood will do if the Baltic Birch is difficult to find. Baltic Birch ply is rarely available from normal lumber yards, but you can find it at shops that sell more exotic woods for cabinet making and fine woodworking. It's not expensive. Divide the hubs into three parts and drill about 15 holes in the areas where the roots of the blades will be between them. Easiest is to drill them out together. Use a compass to lay out neatly where the screws will be before you drill the holes. Then countersink the holes so the screw heads will be flush with the top of the plywood. Drill a small hole (About 3/16" is good) in the center of both hubs - this will make centering and alignment of the two hubs easy.
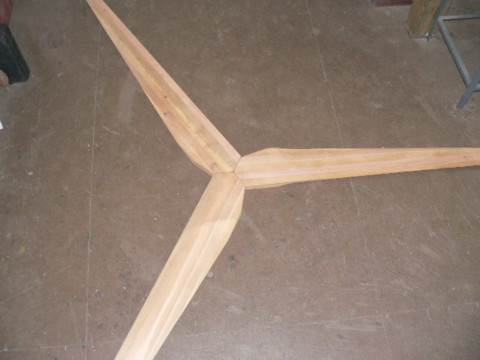
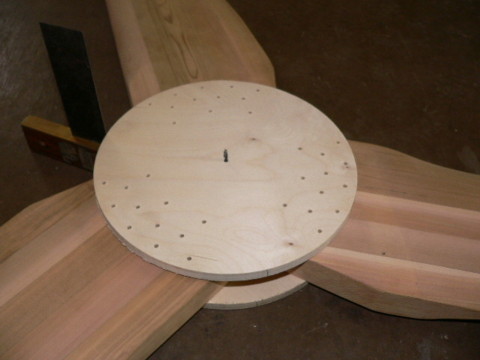
Lay out the 3 blades with the flat sides (the side that will face into the wind) up as shown in the picture. If you cut the 120 deg. angles accurately they should fit together fairly tightly. There should be a tiny flat spot on the center of each blade where they meet each other so that when they come together there is a hole in the center of it all big enough for a small drill bit to help make sure we get everything (the blades and hubs) centered perfectly.
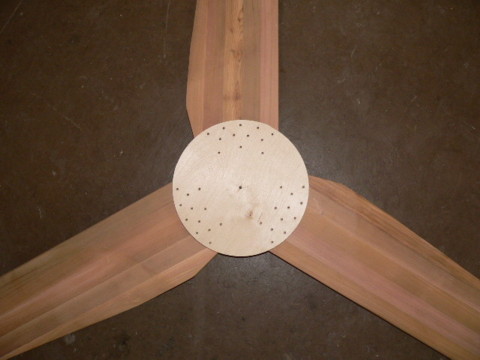
Center one of the Birch hubs over the blades and line up the screw holes you drilled over the blades. It's helpful to place a small drill bit between the blades and through the center hole in the hub to get things centered up well.
Put one screw through the hub into each blade. This will hold it all together fairly well so you can make adjustments.
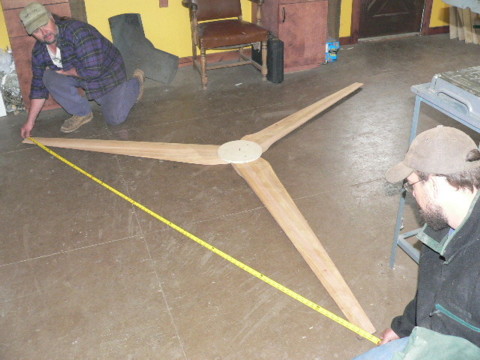
Use a tape measure and measure the distance from tip to tip between the 3 blades. You'll be able to make small adjustments because there's only one screw holding each blade to the hub. Get them fairly close (within a quarter inch or so) and then put another screw into each blade to hold them in position.
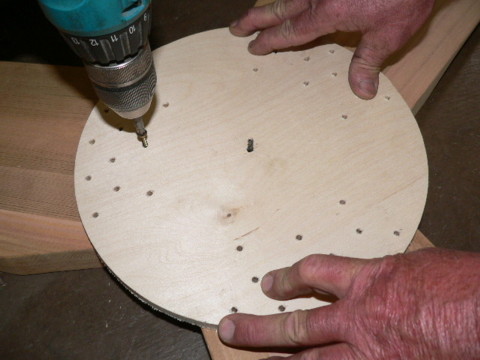
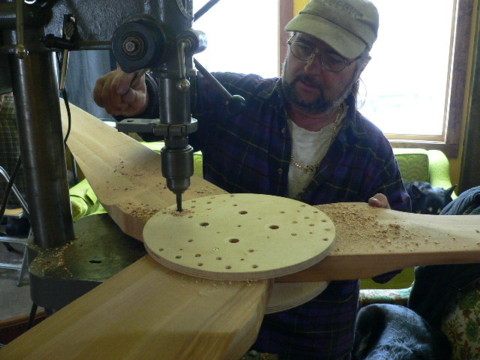
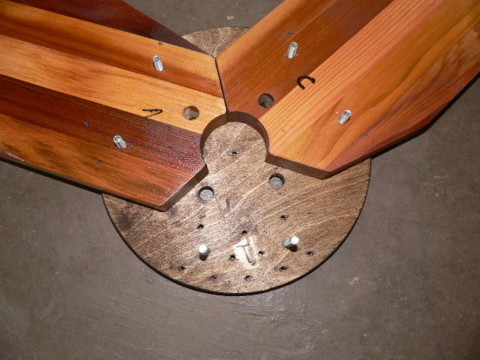
Carefully turn the blades over as shown in the image above.
Use the drill bit through the center and also a square to be sure the back hub is both on center and perfectly aligned with the front hub.
Turn the hub so the screw holes so they're centered over the blades.
Put a screw through the back hub into each blade. At this point, if you never care to disassemble them again before installing them you could put all the screws in. We prefer to get everything drilled out and ready, then disassemble everything and finish each part seperately. For that reason we only put in one screw into each blade.
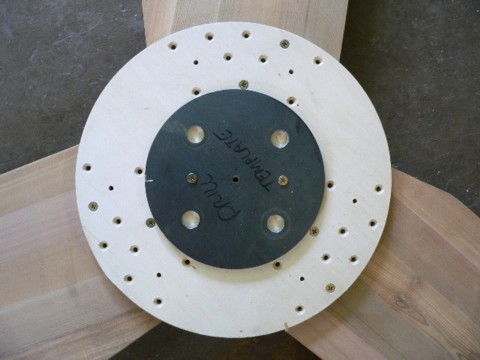
We use a front steel blade hub (6" diameter disk from 1/4" thick steel drilled out with 4 holes on a 4" diameter to fit the wheel hub) as a template for drilling out the holes in the blade for mounting. You could also just lay it out carefully - but it's easier to have a template that you can center on the blades.
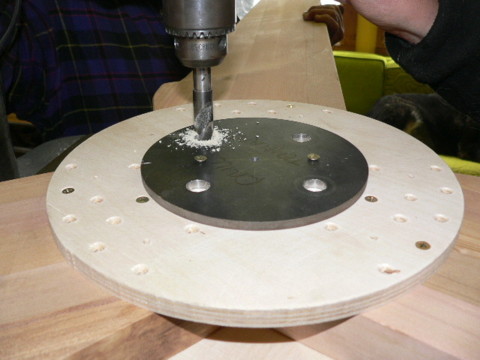
Drill through the blade assembly with a 9/16" drill bit.
Wood screws alone will hold the blades together fine, but we like to drill 6 5/16" dia holes through the assembly (two holes through each blade) so that we can also have two 5/16" bolts through each blade squeezing the 'sandwich' together. This may become clearer in later images of the assembly.
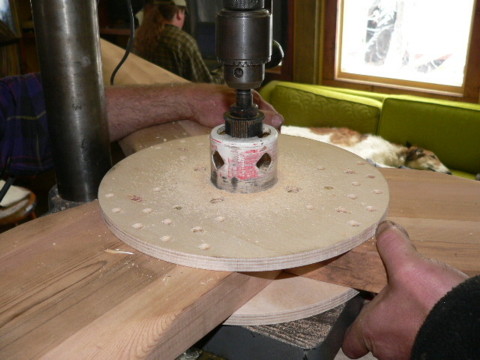
Turn the blades over and use a 2.5" diameter hole saw to cut a hole through the back hub, and all the way through the blades. Don't go into the front hub.
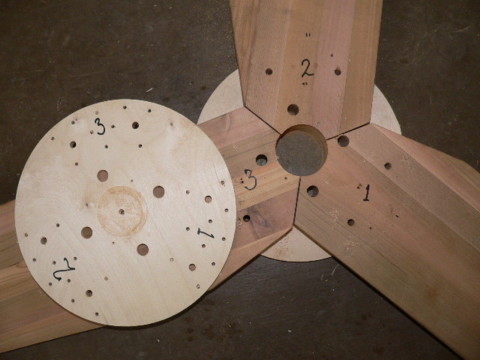
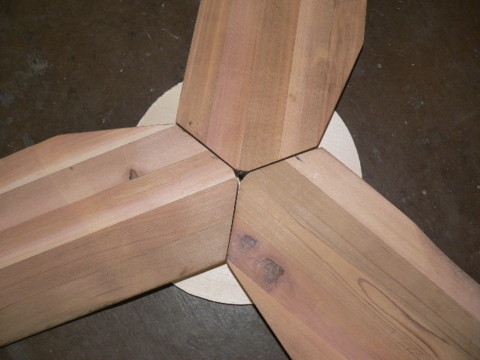
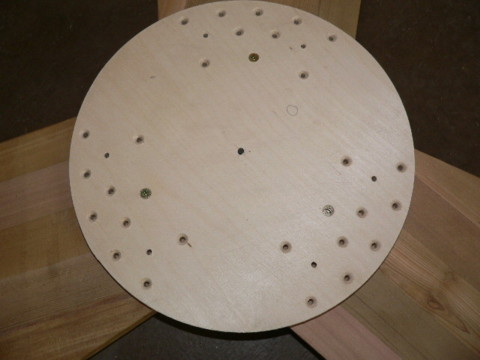
Again - you don't need to disassemble it again, but we prefer to. Pictured above we've removed the front hub. If you do take it back apart, be sure to number or mark everything so that it goes back together the same way in the future. This whole assembly only fits together one way. We usually mark each blade with a number and then number the hub.
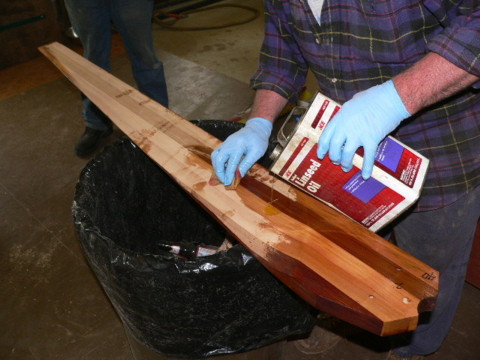
Now is the time to put finish on the blades. We usually put on a thick coat of linseed oil. Linseed oil makes a nice finish but it requires maintenance. Usually before raising the wind turbine we need about 4 thick coats of oil. After this, it should be wiped down once or (preferably) twice a year. The hubs should also be finished on both sides. We usually stain them dark (for appearance only) and then coat them with oil.
Put the 6 carriage bolts through the front of the front hub (the front hub is the one without the big hole in the middle that will face the wind).
Turn the hub upside down (so the threads are poking up at you) and put the wind turbine blades on (facing down - the flat surface that faces the wind should be facing down) so that the bolts go through their holes in the blades.
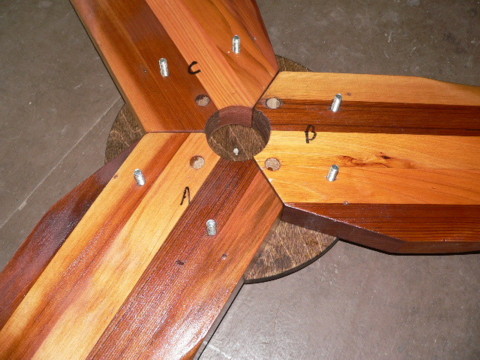
Pictured above all the blades are placed over the front hub with the bolt threads sticking up, ready for the back hub to be put on. Notice the letters on each blade so that we're sure to get the back hub aligned properly.
Put a washer, a lock washer, and tighten a nut on each bolt. You want to tighten these fairly well so that you'll pull the carriage bolt all the way down into the front plywood hub. Over time the wood will crush a bit and you'll want to tighten these at least once a year. Once the bolts are tight put a wood screw into each hole on the front and back hubs. Once you've got that done the blades are fully assembled and ready to mount on the wind turbine.